Optery for Business brings our award-winning personal data removal service to your organization, protecting your employees and executives from phishing, social engineering, identity theft, fraud, harassment, and other PII-based cyber threats.
You can create an account for your organization on your own now with the easy self-service instructions below or we’d be happy to answer your questions or walk you through the process on a live demo.
Optery for Business Demo Overview
1. Create Your Business Administrator Account
The first step is to create your Optery for Business Administrator account. Creating your Business Administrator account is quick, easy, and free, with no credit card or payment method required to get started. Get started at: https://business.optery.com/signup.
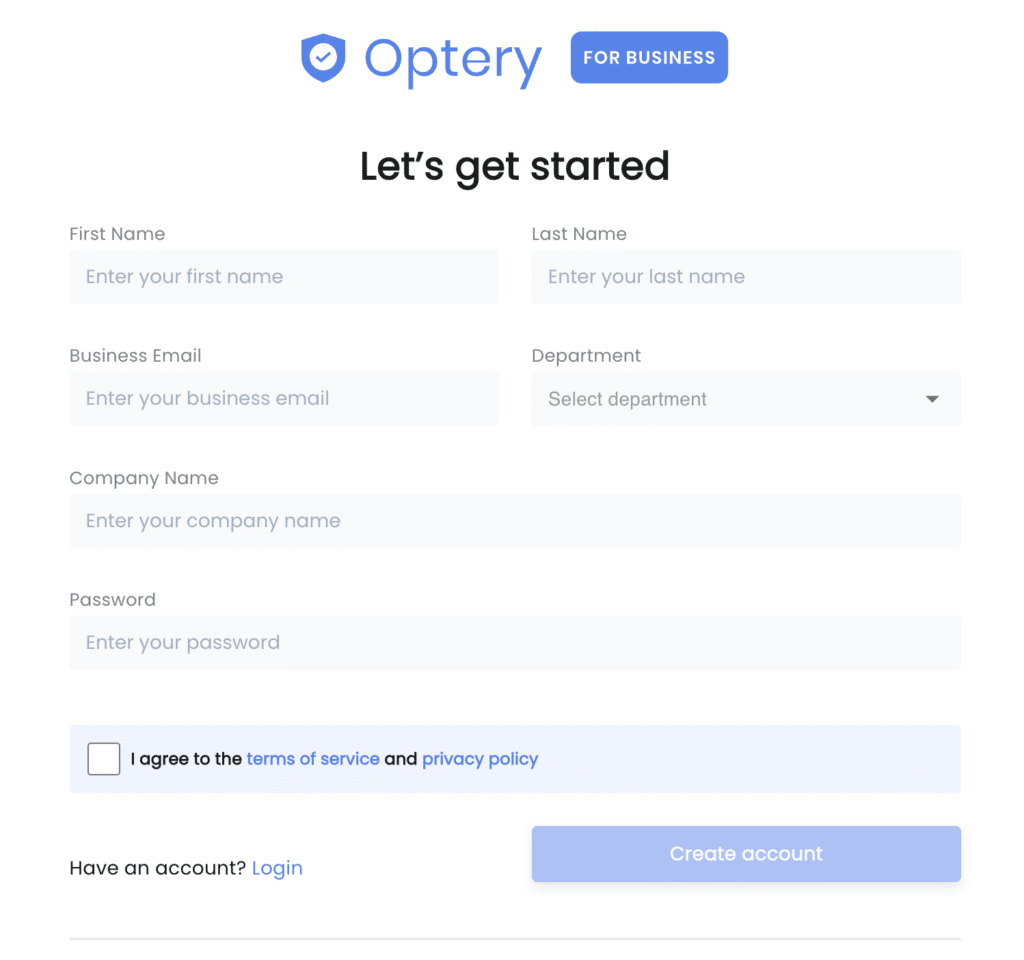
If you already have an Optery personal account, you will log in to your business admin dashboard using your same Optery personal account credentials to create your Administrator account here: https://business.optery.com/login.
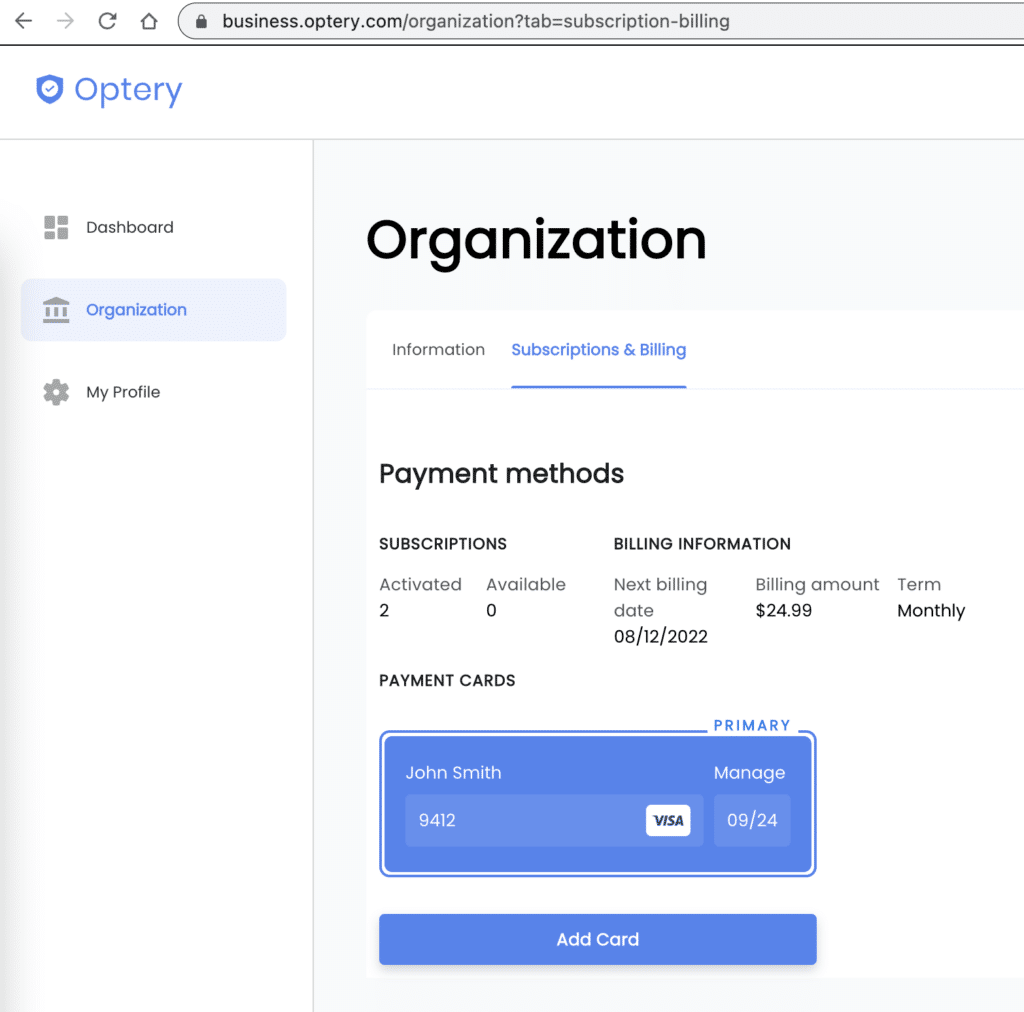
2. Complete Your Optery for Business Account Setup
Once you’ve created your Optery for Business account, you can complete your account setup by adding a payment method to your account and selecting your billing preferences (e.g. Monthly or Yearly billing).
If you have questions about billing, or would like assistance with a traditional Purchase Order or Invoicing process, you can schedule a call with our team.
With our default Monthly “Pay As You Go” billing option, you can activate and deactivate covered members at any time, and each month you pay only for what you use. This provides maximum flexibility for cash flow management and dynamic coverage needs. You avoid vendor lock in, and there’s no need to pre-pay for service you may not use later. This option is completely self-service.
With the Yearly “Pay As You Go” billing option, your total cost per plan is lowered through the yearly discounting, and you maintain the flexibility of paying only for plans when they are activated. This provides maximum value combined with flexibility. This option is completely self-service.
With the Yearly “Full Prepay” billing option, you tell us how many plans you want to purchase in advance, we will invoice you, and you will pre-pay for a set number of plans in advance. The volume discounting is greatest, and this billing option is sometimes preferred for its predictable annual lump sum billing. If your needs change, you can always purchase more plans later at pro-rated rates for partial billing terms. For this option, you can schedule a call to discuss the procurement and invoicing process with our team.
Select your billing preferences here: https://business.optery.com/billing
After you’ve completed your registration, you can start protecting your team using the self-service steps below, or we’d be happy to provide a demo or answer questions about protecting your organization. Click here to schedule a call.
3. Add a Personal Account to Your Registration
As an Administrator, if you haven’t created an Optery personal account yet, we highly recommend creating an Optery personal account for yourself to see how it works from the covered Member perspective. You can do so by clicking on your initials in the upper right corner of the business dashboard and then selecting ‘Switch to Optery Personal’. To complete your personal account, simply fill in your information. Even if this account is under our free tier, you will receive your free personalized Exposure Report and experience firsthand what your team members will see.
You can switch back and forth between an Optery personal account and your Optery for Business account using the same login credentials (learn how).
If you choose not to set up a personal account, you can watch the below video to understand the typical covered Member’s onboarding experience.
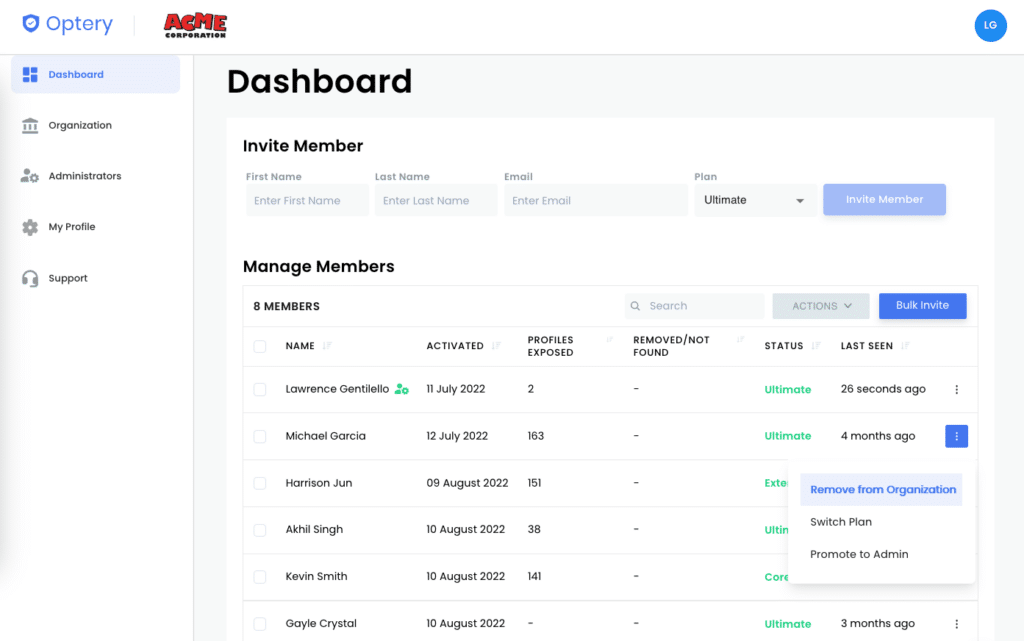
4. Start Inviting Your First Team Members
Now you can go ahead and invite your team members. As an Administrator, you can invite members from your business dashboard using one of the following options:
Manually, One-at-a-Time – enter the First Name, Last Name and Email Address of each member and then click “Invite Member” one by one.
Bulk CSV Import – you can use the Bulk Invite feature if you have a large number of members to invite.
SAML / SSO / SCIM – review the documentation for setting up automated provisioning and de-provisioning via SAML / SSO / SCIM.
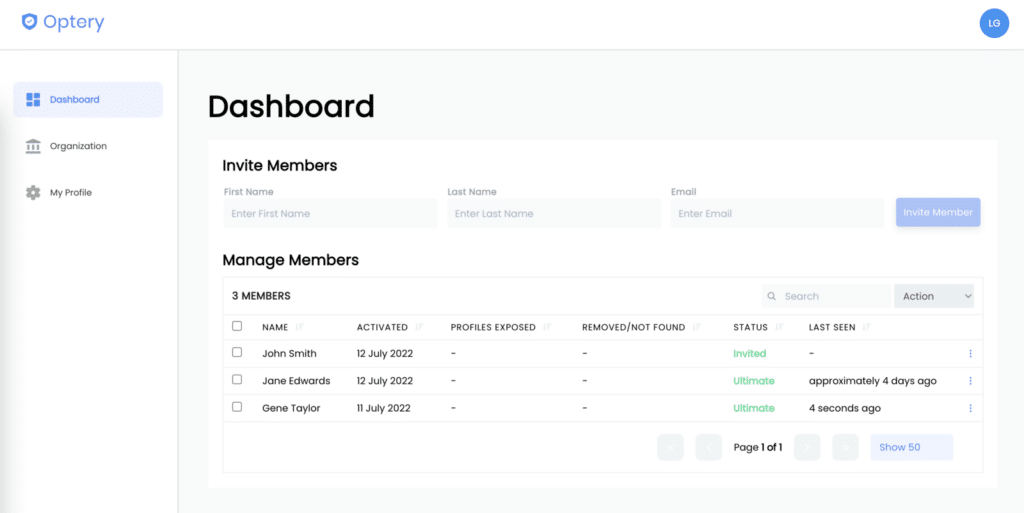
After you click “Invite Member”, each team member will receive an email invitation to complete their sign up. After your team member completes their signup, they will receive their initial Exposure Report, and opt out processing will start within 1 – 3 business days (usually the same day). Learn more from our documentation on the Optery for Business covered member onboarding experience here.

You can easily select the subscription tier for each team member and upgrade or downgrade team members at any time.
If you are on a “Pay As You Go” billing option, each month or year (depending on Monthly or Yearly), your payment method will only be charged for team members with an active plan. Team members you’ve invited that have not yet activated will incur no cost. You can add and remove team members at any time and will only be charged for active team members. You can also upgrade or downgrade team members between plans at any time (e.g. Free Basic, Core, Extended, Ultimate), and all charges / credits will be pro-rated based on the plan activation and renewal dates.
That’s it for getting started with Optery for Business! Have questions or need assistance? We’re just an email away at support@optery.com.